Saturday, July 23, 2011

Grilled Basil Salmon

HELLLLOOOOOOOO, Everybody!

I decided I needed to get back to this blog, since I've been cooking up some serious yumminess this summer ;-)

This is the simplest recipe I've posted so far, but still super good. Seriously...


Doesn't that look yummy?? And yes, those are green beans and potatoes from our garden. And they are supremely awesome as well.

Here's the link to the recipe:
http://www.yummly.com/recipe/Grilled-Basil-Salmon-Recipezaar

And here's what you'll need:


We had two salmon fillets, slightly over 1/2 lb. each.
2 Tbsp lemon juice (which is exactly what I was able to get out of that lemon)
2 Tbsp red wine vinegar
1 tsp grated lemon rind
2 tsp basil
1 clove garlic, minced (instead of the garlic powder in the recipe)
2 tsp soy sauce
5 tsp grated parmesan cheese
1/8 tsp pepper

We used aluminum foil rather than the foil pan, but same idea. Mix the lemon juice, red wine vinegar, lemon rind, basil, garlic, and soy sauce together and pour it over the salmon fillets, then sprinkle with parmesan and pepper, wrap it up, and tell your husband to grill it -- easy, peasy. ;-P


Next time I need to remember that when I go get fresh basil off the deck, I need to use more (three times as much is what I've read) than the recipe says, because they're probably talking about dried herbs, which have a more concentrated flavor. Note to self: don't let the fantastic aroma fool you into thinking it'll have an overpowering taste.

Oh, and look: Matt's eating veggies and looking pretty happy about it!


Success!

Wednesday, February 9, 2011

Cheesy Rice Stuffed Chicken Breasts

Two posts in one day -- I'm making up for lost time. I actually took pictures of this one: go me!

I kind of feel like this recipe was a little more trouble than it was worth... but it was different, sorta unique presentation, and my husband ate chicken breast without complaints ("it's usually really dry").

So, here is the link: http://www.allthingscheese.com/cheesy-rice-stuffed-chicken-breasts/

And here are the steps and pictures, when the recipe is quartered (SERVES 2)...

1/2 Tbsp. Cream Cheese (in the interest of full disclosure, I used Neufchatel cheese: less fat, worked fine)
1/4 cup shredded cheddar cheese
1/4 cup instant white rice, cooked (which we don't have in our house, so this recipe took a little while longer for me, because I had to cook up some rice. Oh well.)
1/4 cup frozen chopped broccoli, thawed (which we DID have in the house, for when I miss the Garden Deli and make my own stuffed potatoes)
2 boneless skinless chicken breasts, pounded to 1/4-inch thickness (recipe says these should be "small" which I don't believe ours were, but I made it work)
Ranch dressing

Here's my pounding picture:
I moved that cutting board for the pounding part. Cast iron skillet + chicken breasts + plastic wrap = Hubby concerned about the whole kitchen shaking + flat as a pancake chicken breasts.

1. Preheat oven to 350 degrees.

2. Mix cheeses, rice and broccoli together.


3. Place chicken breasts on cutting board, top sides down. Spread evenly with rice mixture.

4. Starting at a small end, roll up the chicken breasts as tightly as possible. Place seam-side down in a baking dish and drizzle with dressing. (As I expected, a bit of the filling came right on out of the rolled up breasts, so I just piled it on top of the chicken for baking.)
If you follow the recipe exactly, you may have less dressing. I didn't really feel like measuring it out just for the sake of dirtying another dish, so I just drizzled it on top straight out of the bottle.

5. Bake for 35-40 minutes, or until the chicken is cooked through (I let our somewhat large breasts cook for at least 40 minutes).
The one on the right popped open during cooking, but tasted just fine to me :)

Taco Night

These recipes are from January 17th, which also happens to be the date that we made supper quick, then high-tailed it to the hospital to welcome our niece (my husband's sister's baby) into the world. No pictures -- had other things on my mind -- but wanted to share the recipes anyway.

Mexican food in general has always been a contentious area of food with my IBS, but I feel a lot more comfortable making it in my own kitchen than rolling the dice at a restaurant. Not including red meat helps, as does making my own seasoning, rather than possibly encountering MSG which is often included in seasoning packets.

Tacos: http://www.eatingwell.com/recipes/lean_spicy_taco_meat.html
I used all ground turkey meat, opted for the chili powder over the ground chipotle chile, and bought store brand diced tomatoes with green chiles. We used store-bought shells and tortillas, and if I remember correctly, added green leaf lettuce, tomatoes, and cheese as toppings. Very basic, but pretty tasty :)

Rice: http://simplyrecipes.com/recipes/spanish_rice/
Since we only did a half-recipe of the meat, I used the rest of the diced tomatoes with green chiles for the tomatoes called for in this recipe. This makes quite a bit of rice, so depending on how many people you're trying to feed, consider a half-batch.

Fairly quick, pretty easy, and somewhat healthy... but if you want to see it, you'll have to make it yourself! ;-)

Thursday, January 13, 2011

Commenting Problems

Hello! A couple people have told me they've been unable to post comments. Not sure what the problem is -- they aren't being filtered as spam; they're just not appearing. Sorry for the glitch. So far, everyone who is reading this knows how to reach me through some other avenue, so until it gets fixed, feel free to contact me via Facebook, email or phone...

I might abandon the blog and just start posting Facebook notes! (think they'll kick me off for saying that?)

Yummy Slow Cooker Roast

Yep, that's what I have it bookmarked as, so that's what I'm titling this entry :)


Here is the original recipe I found (click on recipe). I don't have many comments to go along with this, other than it's good and you should try it, even though it's apparently extremely high in fat. I guess that makes it a good dish for wintertime, when you get extra cardio while shoveling the driveway!


Ingredients:


1 lb medium red potatoes, cut into quarters
1 cup carrot, cut carrots about same size as potatoes 
3 lbs boneless beef chuck roast (not pictured -- ours was only two pounds)
3 tablespoons Dijon mustard
1-1/2 teaspoons dried rosemary leaves, crumbled (or 2 tablespoons chopped fresh rosemary leaves)
1/2 teaspoon dried thyme leaves (or 1 teaspoon chopped fresh thyme leaves)
1 teaspoon salt
1/2 teaspoon pepper
1 small onion, finely chopped (I ended up using dried onion -- as you can see, the one I had on hand was not "small")
1 1/2 cups beef broth, can be canned or make it from beef granules (I used bullion cubes for the first time -- we had some weather that kept me from running out to the store)

Directions:


1. Arrange potatoes and carrots around outer edge of slow cooker. The original recipe said to use a 4-5 quart slow cooker, but I used what I have, which I'm guessing is smaller than that, but it worked fine, and we don't have the space to store a larger slow cooker anyway!


As you may have noticed, I added way more than one cup of carrots -- I like veggies, and am trying to force them on the hubby... figured when they're infused with tasty flavor is the most likely time I'll get him to eat them. Also, the potatoes aren't quartered, as they seemed more "large" than the "medium" that the recipe calls for. I just tried to end up with veggies that were equivalent in size.

2. Trim excess fat from beef (gross).

3. Mix mustard, rosemary, thyme, salt & pepper.


*yum* 


4. Spread evenly over beef.


5. Place beef in slow cooker... on top of veggies, if you have a small crock pot like me.


6. Sprinkle onion over beef. I also added minced garlic on top, upon the suggestion of some comments. I think people said they added it in the mustard mix, but I forgot about it until I put the roast in the slow cooker, so that's when I added it.


7. Pour broth evenly over beef and vegetables.


8. Cover and cook on low heat setting 8-9 hours, or until beef and veggies are tender. (You're not supposed to take the lid off a slow cooker, so I think it's funny that they say "or until tender".) I hope, for your sake, that everything is tender after 8 hours, because (as is the case with many crock pot recipes) it smells too good to wait much longer.

 *double yum*

9. Remove beef and veggies from slow cooker with a slotted spoon, slice beef, serve with juices from slow cooker spooned on top, if desired.


10. If there happen to be any leftovers, you can freeze them.


Actually, I think I'll have the last of the leftovers for dinner tonight, thankyouverymuch.

Sunday, January 9, 2011

The Ultimate Chocolate Chip Cookie

Well, I've reverted to my baking ways... that didn't take long, did it? I'll never give it up, and I figured I could include some of these recipes too, for anyone who's curious.

So, I made these cookies many, many years ago, and people just LOVED them. What's my secret? I followed the recipe supplied with the packaging for Crisco shortening sticks:

Got that?

teehehe.

(holy smokes - if you follow the link above, they even have a video! You might just want to click through and stop reading my lowly post right now.)

Okay, if you're still reading, you make me happy, and for your dedication, I'll type this out for you...

3/4 cup (3/4 stick) Butter Flavor Crisco Shortening
1-1/4 cups firmly packed light brown sugar
2 tablespoons milk
1 tablespoon vanilla
1 egg
1-3/4 cups all-purpose flour
1 teaspoon salt
3/4 teaspoon baking soda
1 cup semi-sweet chocolate chips
1 cup coarsely chopped pecans (optional - if you know me, you know these were omitted for my batch)

So, for the visual people, here's what you need:


This recipe says that you should add more chocolate chips if you leave out the nuts, but I don't even add as many chocolate chips as the recipe calls for, because... well, I just prefer them that way -- I know some people will call me crazy, but it seems like an excessive amount of chocolate, especially when the cookie has a good flavor.

Here are the instructions:

1. Preheat oven to 375.

2. Combine shortening, brown sugar, milk and vanilla in a large bowl. Mix until well blended. Beat egg into creamed mixture.

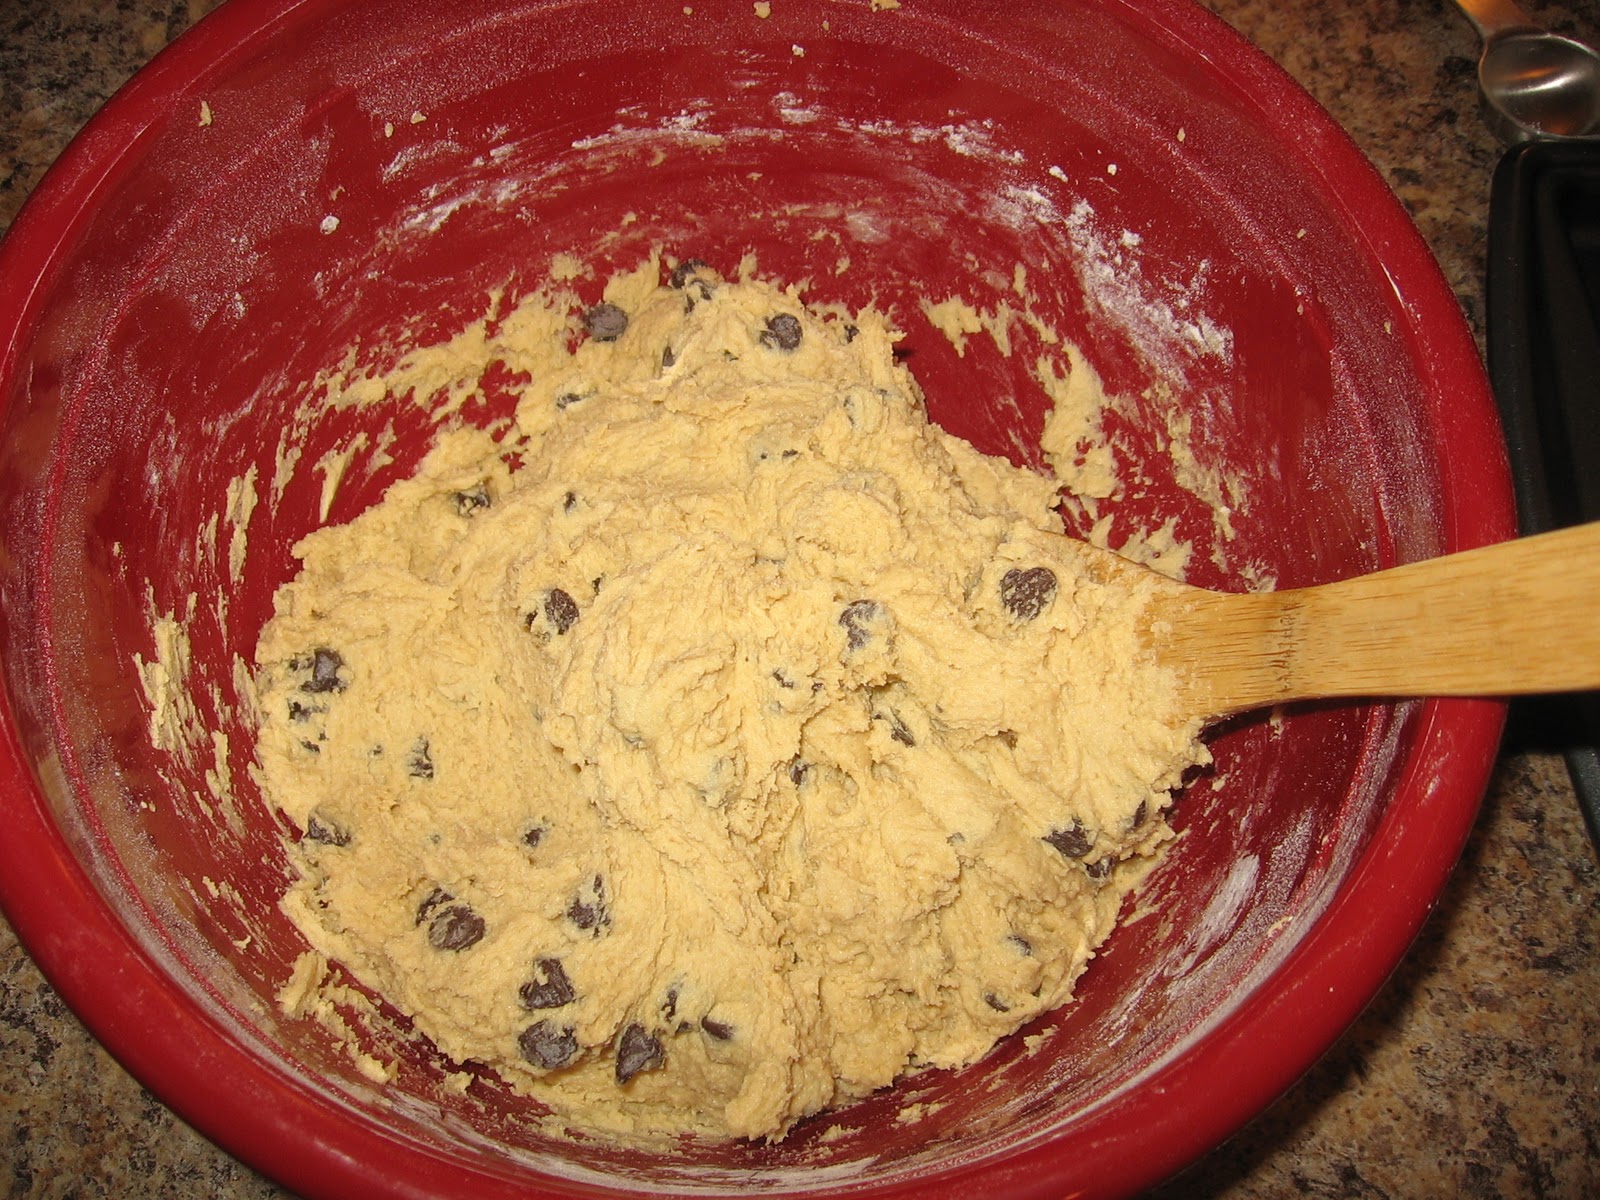
3. Combine flour, salt and baking soda. Mix in just until blended. Stir in chocolate chips (and pecans if using).


3a. Test cookie dough ;-)

4. Drop by rounded tablespoonfuls (I use this, which is two tablespoons) three inches apart onto ungreased cookie sheet.*


*Following the advice of a friend, we registered for these baking mats, and they're pretty nice, and not sent to the landfill like parchment paper.

5. Bake for 8-10 minutes (11 to 13 minutes for crisp cookies, but I prefer chewy). Cool 2 minutes on baking sheet. Remove cookies to rack to cool completely. 

Right out of the oven

I only have a little bit of editorializing that goes with this recipe ;-)

a. First, does anyone have a user-friendly way to measure shortening??  Crisco has these sticks available, but they're significantly more expensive per-ounce than the tub. I use a measuring cup with clear sides, so at least I can see where there are voids and compensate, but just curious if there's a trick I'm not aware of.

b. Personally, I never preheat the oven right away -- our oven takes 15 minutes to preheat, which is probably how long this recipe would take to prepare if everything was pre-measured. But this is the real world, and I measure as I go. The oven gets turned on after the egg is added. Yay for energy conservation, even in small doses.

c. Since these need to cool slightly on the baking sheet before they're sturdy enough to move to wire racks, it works particularly well if you have two cookie sheets. Well, it always works best if you have two cookie sheets, just to keep thing moving.

Finished product

Are you craving chocolate chip cookies now? And hating me? ;-)  mmm... those do look good, think I'll go grab one (or three)!

Saturday, January 8, 2011

Honey Garlic Chicken

I went on a searching spree a little while ago, because the hubby likes dark meat chicken. I bookmarked quite a few options, and Honey Garlic Chicken won out tonight. I halved this recipe (because we're two people) and added garlic as suggested in the Comments section; so, here are my adjusted ingredients:


4 chicken pieces (2 legs, 2 thighs)
1/4 cup (apple cider) vinegar
1/4 cup brown sugar
1/4 cup ketchup
1/4 cup honey
1 teaspoon soy sauce
1/2 teaspoon garlic salt
1/8 teaspoon dry mustard
1/8 teaspoon minced garlic
1/8 teaspoon salt (optional)


A couple other notes: this seemed rather high in sodium to me, so that's why I marked the salt as optional -- I imagine it could be left out without the taste of the final product being impacted. Also, I'm not sure about the inclusion of garlic salt... next time I'll probably leave it out and add extra minced garlic or garlic powder. Regarding vinegar, I usually use apple cider vinegar for cooking, and leave the white vinegar for cleaning... just use what you prefer/have.


Here are my step-by-step instructions:


1. Mix the above ingredients (other than chicken) together. Preheat oven to 350 (unless you plan to let this marinate a few hours; in that case, hold off on the preheating ;-)).


2. Spray baking dish with non-stick cooking spray (not sure if this really makes a difference in clean-up, but figured it's worth a shot even if it helps a little).


3. Dip each piece in the sauce to coat, then place in the baking pan and pour the sauce over the chicken pieces (again, not sure if dipping made a difference, but I wanted to be sure the whole surface got covered).  Allow to marinate, if desired (I didn't, and it was still awfully tasty).


4. Bake at 375 for 40 minutes with foil covering the baking dish. I removed it every 15 minutes and brushed the juices onto the chicken (a different recipe I found that I'll post another day sold me on basting, so while it's not in this recipe, I did it anyway -- I'm a rebel like that). 


4a. We had this with jasmine rice (and it was awesome -- I highly recommend it). Whether you go that route or not, once the chicken is in the oven, fix your sides. (Thanks, Tracy, for the rice cooker!)


5. Remove foil, transfer chicken to another dish temporarily, pour sauce into a small saucepan (thanks, step-sisters!), return chicken to baking dish, and bake, uncovered, for about 20 additional minutes (to an internal temperature of 165). Meanwhile, cook sauce over medium heat, reducing to low heat once it thickens.**


**Yep, deviating from the linked recipe again. I was hungry. So, I increased the temp slightly and decreased the cooking time a bit (the original recipe's cook time seemed rather long to me... you guessed it, I Googled it). Removing the sauce was a suggestion from the Comments section. I added cornstarch, but it clumped, so I'm wondering if it would thicken on its own over medium heat... or is there a trick to adding cornstarch?


6. Serve and enjoy. 


I put the sauce in a bowl and brought it to the table so we could each use it as we pleased. It was a lot yummier than I had even hoped it would be. I wish I had cooked more rice, because we ended up with a lot of extra sauce... and, did I mention, it was yummy! I guess that brings up a good point: if four pieces of chicken aren't enough for you and your family, unless you like to really drown things in sauce, you don't necessarily need to double this recipe. Just make my "halved" recipe as detailed, but add more chicken, and you'll probably still have some sauce left over.


We were naughty and didn't have a veggie with dinner tonight, but I think carrots (maybe Brown Sugar Glazed Carrots) would go well with this dish.


Well, I hadn't really decided I was going to write this blog until about half-way through our meal, so I don't have any pictures for you, but I'll try to be better about that in the future!

Friday, January 7, 2011

What's this all about...

I was going to jump right in, but I realized it wouldn't hurt to explain myself. I bet there's a place in the page design where I'm supposed to do this, but since I don't have the patience on a Friday night to look around at all that, I'll just write it here... and maybe copy and paste some of this to where it "belongs" another day.

So, here's the deal:  it turns out I can cook! I always knew I liked to bake, and I always knew I was a bit intimidated by cooking. Baking is, more or less, an exact science -- you have to add the teaspoon of baking soda or the cookies won't turn out right. Cooking is more of an art, with a dash of this and a pinch of that, and well, if you don't have that, it's fine, just add something else. Yikes!

A few years ago, when I magically became grown-up enough to contribute a dish to pass at family events, I did what made sense to me: I ignored the several cookbooks I'd received as gifts over the years, and I "Googled" it. I remember telling my dad that I liked the work that went into making good food, but I just never invested the time and energy to make things for only myself.

Well, I got married a couple months ago, so now I have another person to cook for. Also, along with the marriage came a move to a new state, and I haven't found a job yet... So, I have a good reason as well as opportunity to spend some quality time in the kitchen (but first, quality time with Google)! No complaints from the husband.

Maybeeeee one complaint from the husband. He's not a big fan of the butternut squash (ridiculous, I know). And he didn't actually complain, he just didn't have seconds when I made Butternut Squash Lasagna. That's a LOT of lasagna leftovers for one little lady. My solution was to freeze half of the pan and take it to my mom when I went home for Christmas. She called yesterday asking for the recipe.

And with that, a blog was born. I realized that there are probably quite a few of my family and friends who don't have the extra time on their hands to find good recipes to try (or would maybe just prefer to spend the time they have doing other things) and might appreciate being introduced to these, which I've actually made with my own two hands (so they can't be THAT complicated). I hope this blog is helpful; if nothing else, it will keep me motivated to continue to try new things!